

Let me tell you right away, starting to treat a room without taking acoustic measurements is simply absurd.
Acoustic measurements are ESSENTIAL to understand what is happening in a listening room and are absolutely INDISPENSABLE for defining and choosing the materials needed for acoustic treatment of the room.
Therefore, the first FUNDAMENTAL thing you need to buy to start treating your room is not a bass trap, an acoustic foam kit, or anything else, but indeed a MEASUREMENT MICROPHONE!!!
Let me tell you right away, starting to treat a room without taking acoustic measurements is simply stupid.
Acoustic measurements are ESSENTIAL to understand what is happening in a listening room and are absolutely INDISPENSABLE for defining and choosing the materials needed for acoustic treatment of the room.
Therefore, the first FUNDAMENTAL thing you need to buy to start treating your room is not a bass trap, an acoustic foam kit, or anything else, but indeed a MEASUREMENT MICROPHONE !!!
In the field of acoustic measurement, before being able to interpret a measurement taken with a microphone, you need to know the flaws of all the equipment that was used for that measurement. That is to say, the sound card, the cable, and of course the microphone.
The essential argument for choosing your measurement microphone is its neutrality.
The more neutral it is, the better! And rest assured, the microphones needed to measure a room are very affordable; you can get one for around 60 euros to 100 euros.
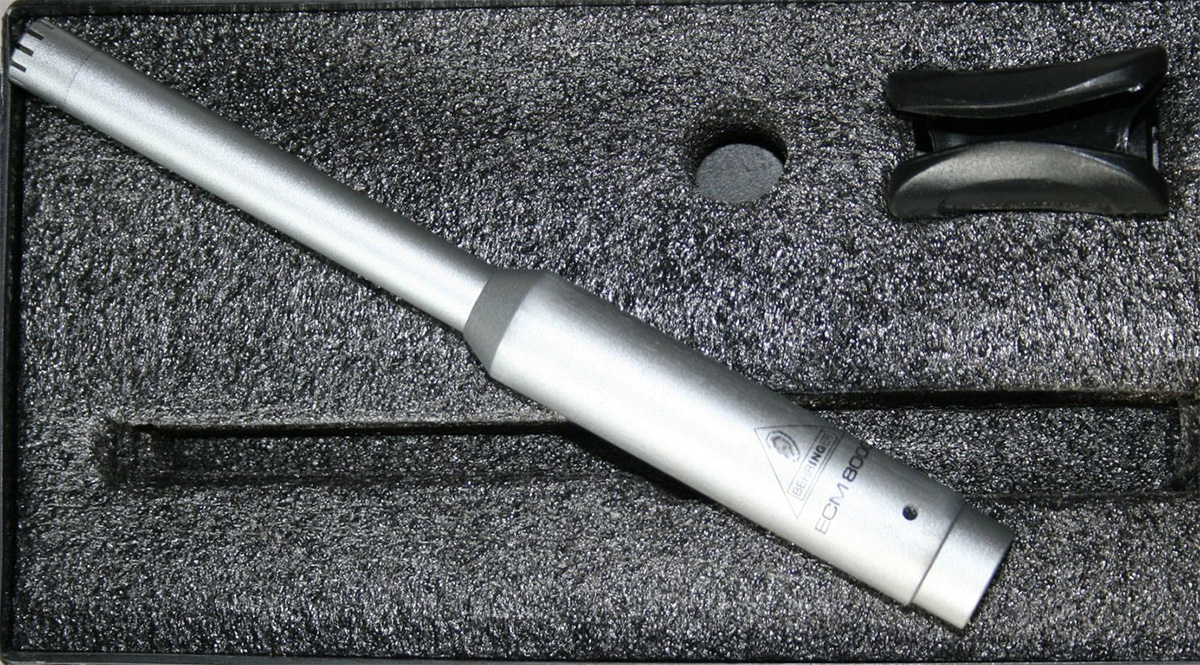
For example, the ECM8000 measurement microphone from the Behringer brand at 63 euros on Thomann.
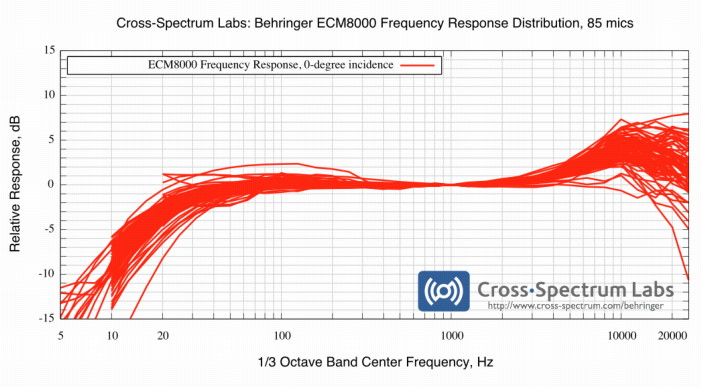
Although its frequency response curve shows a weakness in the high treble, the rest of its curve is sufficiently linear to detect acoustic problems in a room.
Of course, there are others that are much more expensive, easily exceeding 1,000 euros, which are much more precise and therefore perform better. However, their purchase is more relevant for measuring loudspeakers or microphones requiring extreme precision.
In general, microphones used for room measurement are omnidirectional electret microphones.
Unfortunately, no microphone is perfect, and each microphone is unique, which means that two microphones of the same brand, model, and even the same series are different.
Therefore, to address this issue for maximum precision, it is recommended to obtain a calibrated microphone.
A calibrated microphone is simply a microphone that has been measured using another calibrated microphone.
Microphone calibration consists of recording its frequency response in order to establish a curve that identifies its weaknesses.
This response curve appears as a graph that then serves as a reference to compensate for its flaws using measurement software.
A calibrated microphone, when purchased, is supplied with a file or a printed graph used as a reference.
Thus, the second argument for choosing a measurement microphone, aside from its price, is to choose a calibrated microphone supplied with a calibration file or graph rather than a non-calibrated one.
The problem is that manufacturers do not provide a calibration file for each microphone, but instead provide a reference curve representing the average of the series for the same model.
To obtain a truly calibrated microphone, there is only one solution: it must be calibrated by a professional under laboratory conditions.
Unfortunately, it is not that easy to find a measurement microphone calibrated individually rather than by series. So if you cannot find one, and you already have or plan to buy a non-calibrated microphone or one with a series (average) calibration, just keep in mind that below 30 Hz and above 10,000 Hz, you should not rely too much on its measurements.
But rest assured, between 30 Hz and 10,000 Hz, you have more than enough to work properly and adjust the acoustics of your home studio.
Let me tell you right away, starting to treat a room without taking acoustic measurements is simply absurd.
Acoustic measurements are ESSENTIAL to understand what is happening in a listening room and are absolutely INDISPENSABLE for defining and choosing the materials needed for acoustic treatment of the room.
Therefore, the first FUNDAMENTAL thing you need to buy to start treating your room is not a bass trap, an acoustic foam kit, or anything else, but indeed a MEASUREMENT MICROPHONE!!!
12 other products in the same category:
Authorized access
DIFFUSER - With Sticks or Wells, which design is the most effective ?
When it comes to diffusers, "experts" generally agree on a preference for well-based designs over stick-based ones. However, my investigations have led me to the conclusion that, depending on the sequence type and implementation constraints, stick-based designs often yield better results when the number of cells is substantial. After selecting the diffusers (generated randomly using the "Mersenne Twister") that exhibit superior characteristics to QRD, PRD, LSD, and PWRD models, in line with the predictions of my analyzer using the "brute force" method, I set out to examine the similarities in their designs to identify the elements necessary for optimal diffusion.
View this tutorial
Authorized access
copy of copy of copy of copy of copy of copy of copy of copy of copy of copy of copy of copy of copy of copy of copy of copy of
View this tutorial
Authorized access
copy of copy of copy of copy of copy of copy of copy of copy of copy of copy of copy of copy of copy of copy of copy of copy of
View this tutorial
Authorized access
copy of copy of copy of copy of copy of copy of copy of copy of copy of copy of copy of copy of copy of copy of copy of copy of
View this tutorial
Authorized access
Combien de points de mesure pour une calibration optimale ?
View this tutorial
Authorized access
copy of copy of copy of copy of copy of copy of copy of copy of copy of copy of copy of copy of copy of copy of copy of copy of
View this tutorial
Authorized access
copy of copy of copy of copy of copy of copy of copy of copy of copy of copy of copy of copy of copy of copy of copy of copy of
View this tutorial
copy of copy of copy of copy of copy of copy of copy of copy of copy of copy of copy of copy of copy of copy of copy of copy of
View this product
Authorized access
ACOUSTICS 00 - Sound treatment, acoustic treatment of your studio
Having excellent studio monitors, a great sound card, and a wide range of high-end equipment and plugins is certainly more than a good starting point for achieving professional-quality sound, but it actually represents only half of the journey required to achieve a high-quality mix.
Acoustic treatment of the room is an absolutely fundamental step to finally mix properly and gain precision in adjustments as well as save time during mixing.
View this tutorial
Authorized access
copy of copy of copy of copy of copy of copy of copy of copy of copy of copy of copy of copy of copy of copy of copy of copy of
View this tutorial
Authorized access
copy of copy of copy of copy of copy of copy of copy of copy of copy of copy of copy of copy of copy of copy of copy of copy of
View this tutorial
Authorized access
copy of copy of copy of copy of copy of copy of copy of copy of copy of copy of copy of copy of copy of copy of copy of copy of
View this tutorial
Reviews (0)